
For this tutorial I am using my Mattable Volume 1: Fun & Funky matts.

These matts are a very fun way to turn any paper from any kit into a something fun and unique. These fun and funky matts are marked down in my shop right now for only $1!
Also in the tutorial I am also going to use two pretty papers from a mini kit that will be released tomorrow, August 1st (so consider this a sneak peek for you as well lol). This mini kit and the coordinating alpha will be $1 each just August 1st only, after that they will be $2.
Now lets get on with the tutorial :)
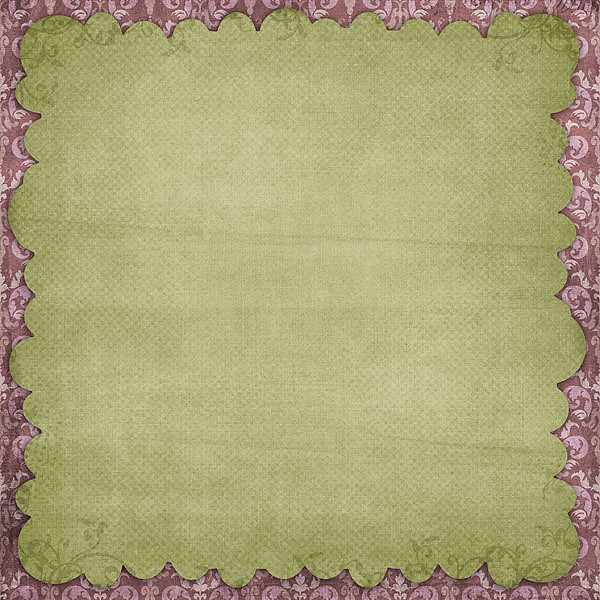
This tutorial will show you how to achieve this look...
If you click on the screen shots below it should allow you too see the images a little bigger
Step one
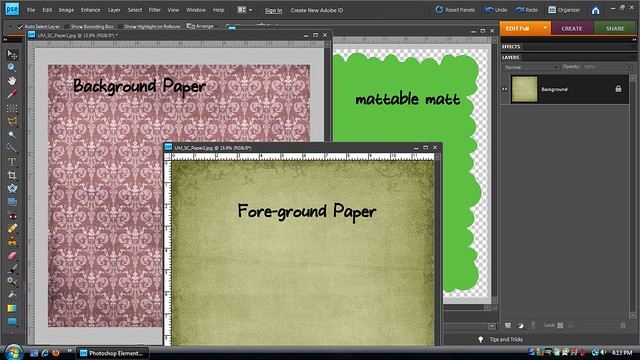
In your software open up your
1) background paper,
2) your matt, and
3) your fore-ground paper (the paper you want clipped to the matt).
Step Two
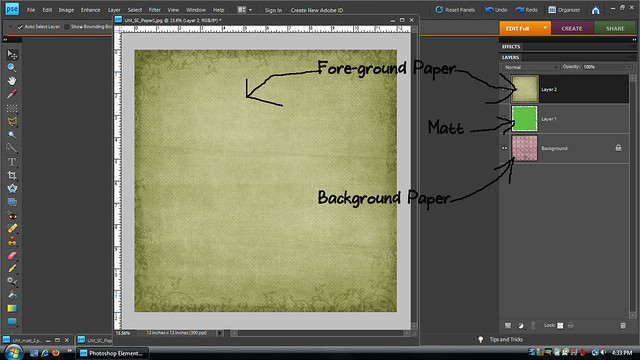
Drag your matt onto your background paper. I just simply click on the matt so it is the active file, and then put my mouse over the matt in the layer panel then click (and hold the mouse button down) and drag it right on to the background paper. Once the matt is over the background paper un-click the mouse.

(I have a little tip written on the screen shot for you too. If you can't read it on there the tip is-- if you hold down the shift key while dragging, the matt will automatically be centered on your background paper).
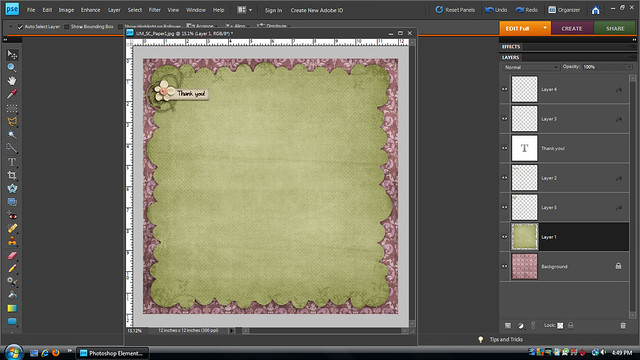
See on the screen shot below the matt is on the background paper?

Step Three
Now it is time to drag your fore-ground paper on TOP of the mat

Now even though our project just looks like it only is one paper; it is actually three different layers. The fore-ground paper is on the top, then the matt, then the background paper.
Step Four
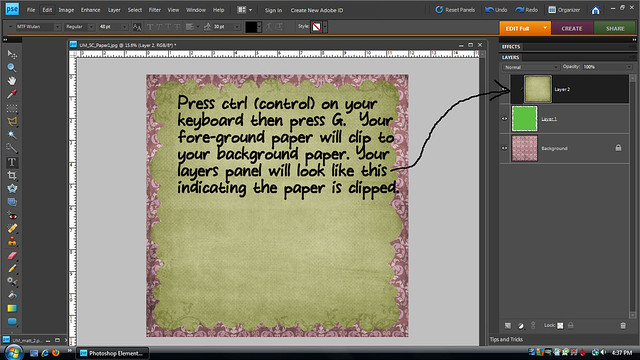
Make sure that the fore-ground paper is the "active layer." That means it is the layer that is highlighted. Then on your keyboard press the cntl key then the G key while you are STILL holding down the cntl key. The fore-ground paper will clip to the matt. It is as if you are gluing the paper to the matt.
Step Five
Continue making your layout!
Thank you for taking the time to check out my tutorial!
If you have any questions feel free to leave a comment or send me an email!
Enjoy your day... and then go scrap it :)
Thank you very much, sweet Amy!! I think now I am going to be able to crop papers the right way! LOL
ReplyDeleteSophie =)
Just a quick note to let you know that a link to this post will be placed on CraftCrave today [02 Aug 01:00am GMT]. Thanks, Maria
ReplyDelete